
I recently found a Netflix video of this motif it was stitched on a hoop. I really liked the look so I gave it a try on temari. This is my learning ball.
I recently found a Netflix video of this motif it was stitched on a hoop. I really liked the look so I gave it a try on temari. This is my learning ball.
Recently I’ve been looking into art forms, other then embroidery, that can be used to decorate a temari. I have always been interested in beading but never had the opportunity to learn it. I was very happy to see that YouTube has many wonderful tutorials and I was inspired to create some beaded temari.
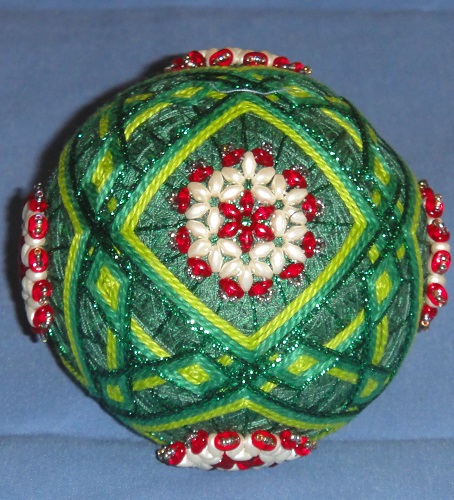
Embroidery from a pattern in the Japanese temari book, Elegant Temari from Osaka and Kyoto. Bead medallion adapted from a pattern in Bead and Button Magazine.
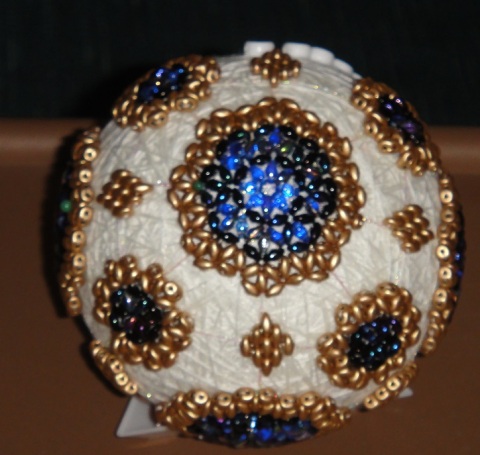
Bead medallions were adapted from a pattern in Bead and Button Magazine
Both of the above Temari were worked with superduo beads. I used a bead weaving technique and then appliqued the medallions onto the mari.
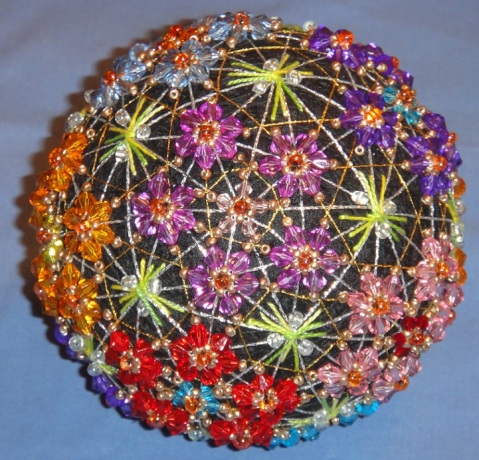
92 face beaded temari. Original design.
These bead flowers were made from bicone beads and seed beads. I also used a bead weaving technique for the flowers and then attached them to the mari.
This ball took a lot of work, but I think the finished temari was worth it.
I prefer the beaded temari with some embroidery. It just seems warmer and more inviting to me. I’m going to look for some traditional patterns that can be reinterpreted with some beading, like the green temari above, but don’t worry, I’ll still be stitching my traditionally embroidered temari as well.
As always, comments and questions are welcomed.
Recently the Temari Challenge Yahoo Group participated in a puzzle it out on how to stitch a camellia flower. We originally thought that the pattern was a C10, but when we looked at the pattern it turned out to be a 122 face pattern. Since the question was: How do I stitch this flower? we decided a puzzle it out exercise would be the best way to learn how to stitch this flower.
First we puzzled out how to stitch the flower on an S10 mari. The white half diamonds are an advanced stitching technique. It is important that the angle of the white thread be parallel to the legs of the red star. the white thread is carried under the thread wrap and must be brought up in the correct place to star the next white section.
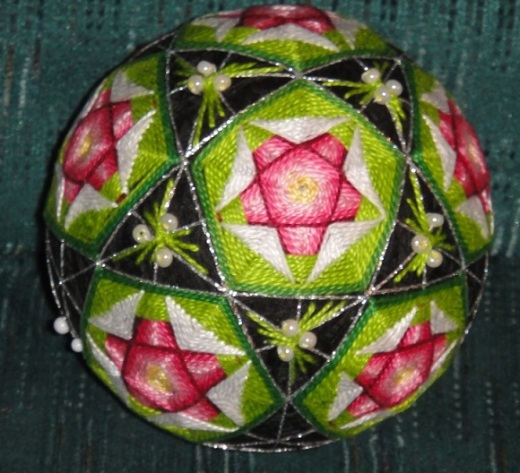
Camellia Flower, original pattern
Next we redesigned the pattern to be able to stitch on a C10. Above is my first redesign. I really like how it turned out. the down side of this is that it is not an easy pattern to stitch. The marking must be very even or your stars will be crocked and all those half white triangles are mildly difficult.
I decide to try something else.
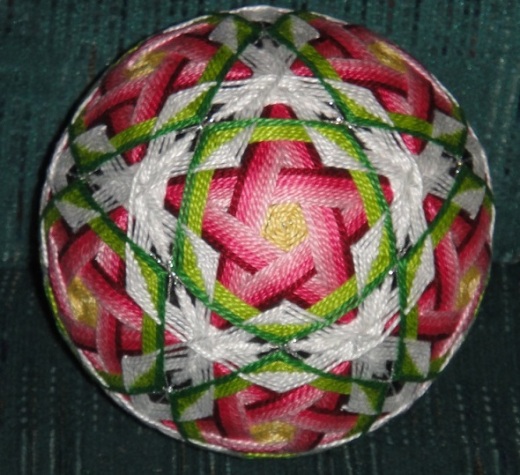
Camellia Flower, Original design
I stitched a different star and for the white section I stitched a large white star around the red star. I like this one better from a distance.
We had a lot of fun with this puzzle it out. I hope to do more in the future.

I used the M3 marking technique in this section to mark the extra guidelines needed to stitch this motif.

This is my least favorite section of this temari. I think I would like it better if it had more rows.

The tri-wing I used to separate each section. At the tips I started with the longest point and then worked toward the center.
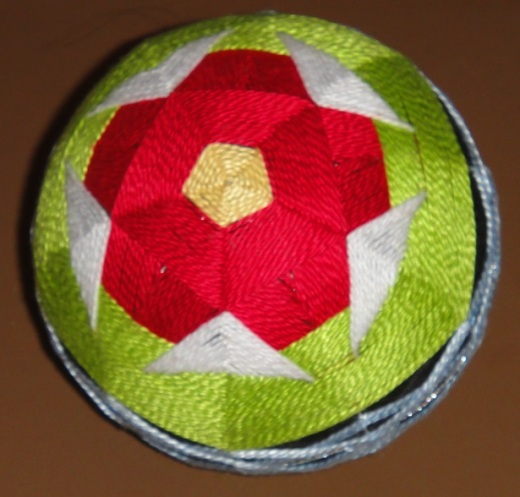
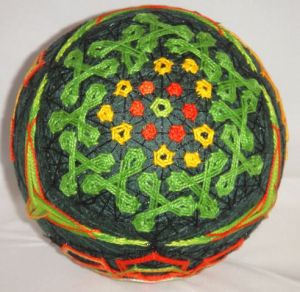
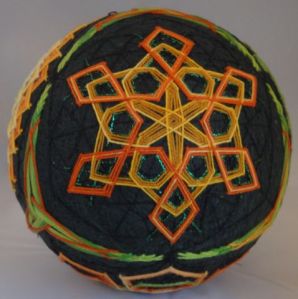
Talk temari Yahoo group recently had a question about the C6 marking. I could not remember ever stitching a temari with that marking. There are very few patterns for it in temari books, but I looked up what few there were and decided to give it a try. 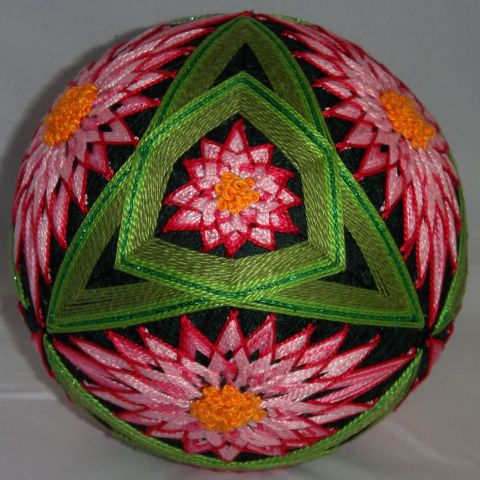
This is my own creation. I hope you like it.

Asanoha or hemp is not a motif I have used a lot in the past. The first photo is what, I believe, most people would think of as traditional Asanoha. It is stitched on an equilateral triangular grid and gives a very even and repetitive look to the filled in area.

The second photo is the Asanoha stitched on a large right-triangle grid. I use this in samplers. It is not as regularly spaced as the traditional Asanoha, but it is a very pretty variation.

The third photo is Asanoha stitched on a smaller right-triangle grid. I am not sure that the photo captured the Victorian feel of the actual temari. I like the look and feel of the Asanoha motif done on the right-triangle grid.
This study was a very interesting learning experience.
Sorry I have not updated in such a long time. I had a very serious health issue. I won’t bore you with the details, but I am back to my old self and stitching temari again.
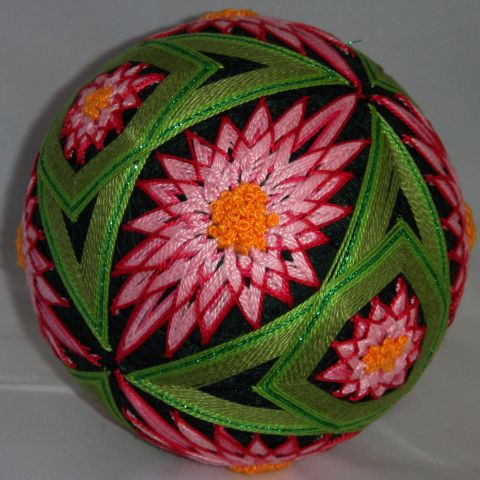
While looking through my temari books and online photo galleries I rediscovered the 3 layer flower. Here are a couple of temari I have stitched. Both were stitched from my head so I don’t have any patterns to reference.
If you look closely at the flowers you will see a small difference in the way they are stitched. On the C10 I let a lot of the first layer, purple star, show. Now look at the first uwagake chadori stitches. On the C10 they are elongated and pulled in with the second row.
On the C8 I also elongated the first white stitch, but with the top layer of the flower I did not pull it all the way in. I stitched around the point of the first layer star. This hid much of the star. I had to do it because I did not have a space to stitch in as I did on the C10. If I had dropped my stitch down below the star point it would have compromised the shape of my top layer flower petal.

I really like how the C10 turned out. It makes me want to stitch it in silk. With the C8; I like the flower, but I am less happy with the over all look of the temari. It just seems like there is too much space. Perhaps if it were stitched with invisible guide lines I would like it better.
 Hello everyone! The holidays are over and life is getting back to normal.
I haven’t done much stitching of temari since my last post, but this is one that I did stitch.
The pattern is in a Japanese book, “Temari For 4 Seasons, vol 2” page 11 ball 7.
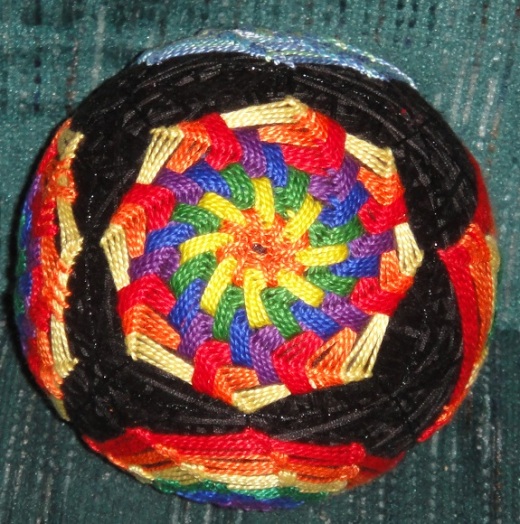
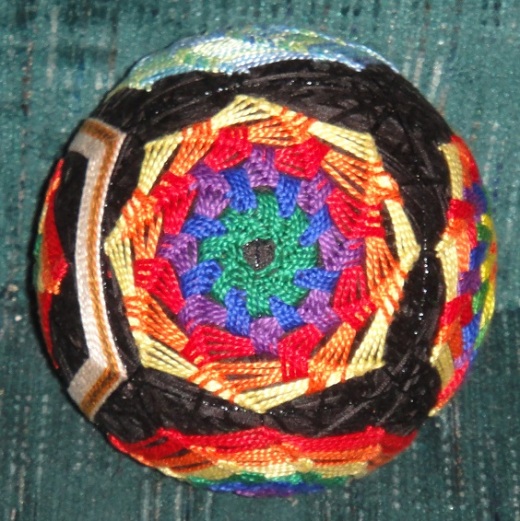
I didn’t like the colors so I changed them. I enjoy doing rainbow color temari.
This was not a difficult ball to stitch as long as you watch your weave.
As you can see, although I stitched this on a black mari I still outlined in black. I find that outlining often gives a temari “pop” when it needs it.
I hope you like it.
I am calling these star renzoku because they all require extra guidelines in the shape of a star.


Even though they are all the same marking a small change in the stitch path can make a big difference in the over all look of the finished temari.
I did have to change the length of the star points on the extra guide lines in order to accommodate the change in stitching.
The first S12 star renzoku that I stitched I found that I had to stitch 2 layers to get six points. (see photo in last blog) I wanted to change that and I did by changing the stitch path at the pole, but I found that the hexagon that was formed was too large and a bit sloppy. I thought about it and wondered what would happen if I changed the stitch path at the petal point. Once I did that it opened lots of possibilities.
In the first photo of the top row I simply moved my petal point over 1 guide line. That allowed me to make one pass and have six petal points. In the first photo of the second row I turned the petal point into a W by stitching Kiku herringbone (uwagaki chadori).
In the second photo of the top row I left my pattern at 3 points and stitched two layers; in between rows I added a kiku herringbone that was not a part of the renzoku stitch path. In the third photo I stitched 4 layers of a 3 point renzoku path.
In the last two photos of the second row I followed a 6 point path but I brought my petal point below the equator so that I would get a diamond effect.
 I have been getting a lot of questions and comments about this one, so I thought it would be good to do a blog about it. It does look striking, especially with one layer done in stripes and one solid.
I have been stitching renzoku long enough so that I had a very basic understanding of the stitching path of this particular kind of renzoku. That is not to say it was easy to understand; it took me years of on and off stitching of Renzoku to be able to stitch them without a diagram.
This topic came up on Ustream right when I had decided that I had enough of HHG temari and was looking for something else to peak my interest. I have always liked this kind of pattern. It reminds me a bit of the Spirograph I used to play with. Ginny had stitched a 4 pointed renzoku, I had stitched a 5 pointed renzoku, so I thought I would go for a 6 point renzoku. I had never seen the pattern in any books, but that wasn’t a problem. I knew the “rules” for the round about path I was planning to stitch so I didn’t need a diagram.
At this point it is important to note, I put the word “rules” in quotation because in temari the are no rules written in stone, other then it must be a ball shape. We can adapt a pattern and when we do we change the “rules” of that particular pattern. I don’t want anyone to narrow the definition of Renzoku. It is much broader than the few temari I have stitched. It is just that, when I delve into playing with a particular pattern or element I give myself parameters to work within and I call those parameters “rules”.
For the temari I was playing with there was only a couple of rules that I gave myself. I would need extra guidelines shaped as a star with inner points approximately 1/3 down from the pole and the outer points approximately 1/3 up from the equator. I found I did have to adjust these by eye but 1/3 was my starting place. The other rule was to carry my thread straight across the pole and take my stitches on the outside of my star point guidelines and not catch previous rows as I stitched.
I followed the above rules and ended up with a 3 point renzoku. It was quite a surprise. I decided to stitch the second path in a solid color so I could see the finished paths better.
There is more that I learned from stitching all the renzoku that I stitched. I know why I get a 3 point renzoku for an S12 marking using the above rules and I know different ways to change the stitch path so that I would get a six point renzoku without having to layer 2 paths, but that is for another blog.
